M4A to MP3: Convert the File and Find the Right Copy
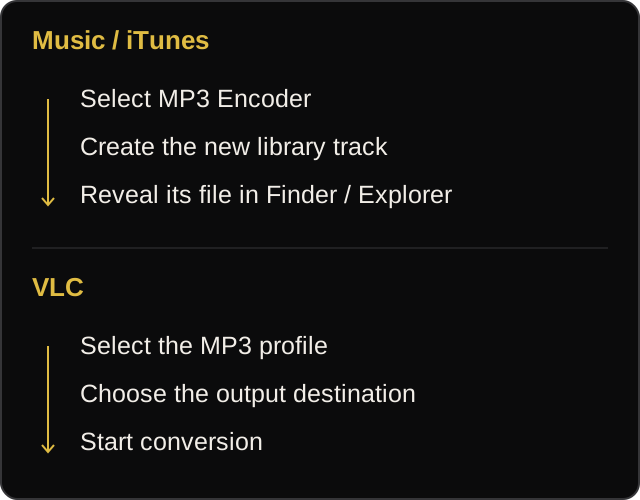
To convert M4A to MP3, select MP3 as the output format, run the conversion, and locate the newly created file. In Music or iTunes, choose MP3 Encoder in Import Settings before using Create MP3 Version; in VLC, choose an MP3 conversion profile and a destination filename. Then copy the MP3 you actually created.
Start with an unprotected file: protected AAC purchases cannot be converted through Music or iTunes. Apple conversion guidance
On this page
Set the output before converting
On a Mac, open Music > Settings > Files > Import Settings and select MP3 Encoder under Import Using. Save the setting, select the imported track in your library, and choose File > Convert > Create MP3 Version. Music import settings
In iTunes for Windows, the starting point is Edit > Preferences > General > Import Settings. Choose MP3 Encoder, save the setting, select your track, and use File > Convert > Create MP3 Version. iTunes conversion steps
In VLC on Windows, open Media > Convert/Save, add the M4A file, and continue to the conversion controls. Select the MP3 profile, browse to the destination folder, enter a filename ending in .mp3, and start the conversion. VLC conversion steps
If the command still says AAC
A Create AAC Version command is a clue to the encoder setting, not a reason to rename your source file. Return to Import Settings, switch the encoder to MP3, save it, and check the conversion menu again. The practical lesson is to fix the format choice before repeating the conversion.
The settings live in different places in Music on Mac and iTunes on Windows, even though both routes use an import encoder to control the converted format. Follow the path for the application you are using.
Two matching song names can hide different formats
Music and iTunes can place the converted track beside the original, so a repeated song title does not by itself mean the conversion failed. Reveal the file before deciding which entry to copy. Use Show in Finder in Music on Mac, or Show in Windows Explorer in iTunes, and identify the MP3 in that folder. Find files in Music Find files in iTunes
VLC asks you to choose an output destination, while the Music workflow asks you to find the new library file afterward. That difference explains where to look when conversion appears complete but there is no MP3 beside your desktop original.
Name the output, then decide what to keep
In VLC, entering an .mp3 destination name belongs to the export setup, alongside selecting the conversion profile. Changing only the original file's extension skips the conversion operation. VLC transcoding guidance
In iTunes for Windows, removing a library entry and deleting its stored file are separate choices. Keep File leaves the file on disk; Move to Recycle Bin sends it to the Recycle Bin. Decide which outcome you want before clearing away an original with the same title as your new MP3. iTunes file deletion options
For the final handoff, use the MP3's actual folder location and copy that file to the destination device or folder. This ties the format you selected to the file you deliver.